Navigate to the “applet” directory, and you will find the generated .hex file:
![](https://youspice.com/wp-content/uploads/2015/01/hexfile_8705311110040276011.png)
![](https://youspice.com/wp-content/uploads/2015/01/openhex_7150481869349228797.png)
Arduino Solar Tracker
Make Your Own Arduino Solar Tracker in a Step by Step Manner, learn and have fun Practicing Arduino!!
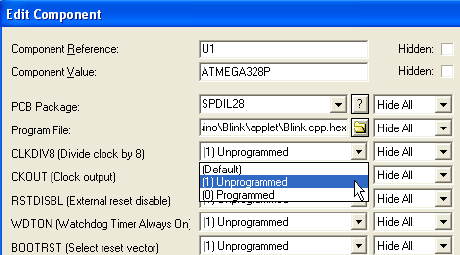
Now return to the Arduino schematic and double-click on the microcontroller. In the window that appears, choose the previously generated .hex file:
![](https://youspice.com/wp-content/uploads/2015/01/selecthex_3038910677032091076.png)
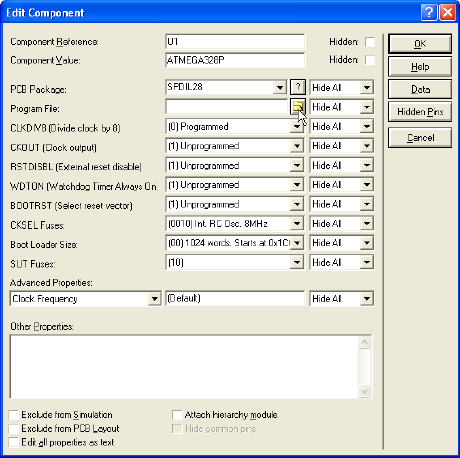
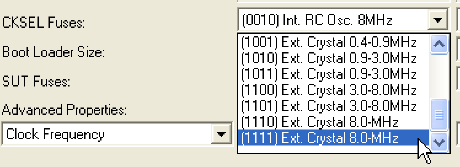
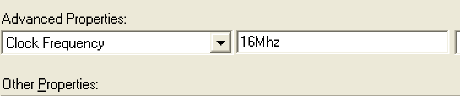
Select the following settings:
![](https://youspice.com/wp-content/uploads/2015/01/unprogrammed_1718271546769566407.png)
![](https://youspice.com/wp-content/uploads/2015/01/clksel_7865736853927835471.png)
![](https://youspice.com/wp-content/uploads/2015/01/setfrequency_1311010832348769196.png)
We are now prepared to initiate the simulation. Click on the play button located in the bottom left corner of the layout:
![](https://youspice.com/wp-content/uploads/2015/01/play_3574398226659510473.png)
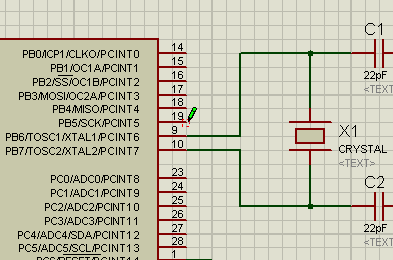
A license for VSM (Virtual Simulation Model) for AVR is necessary to activate the simulation. As a result of running the program, pin 19 of the microcontroller begins blinking with a 1-second period.
![](https://youspice.com/wp-content/uploads/2015/01/ledblinkingeverysecond_844987878839765042.png)
Arduino Water Level Checker with Automated Water Pump
You will learn how to use a float sensor to measure the water level in a tank, and how to use a relay to control a pump